The Right Hand: Curl All Fingers and Hold the Bow Loosely
The bow holding posture is all about leverage. Much like a seesaw, the thumb acts as a fulcrum supporting the bow, the index finger keeps the bow down by transferring arm weight onto the tip (lighter side), while the pinkie and ring finger counter balance the bow at the frog (heavier side). At the same time, the middle finger works with the thumb to keep the bow stable and create an axis of rotation that allows the bow to pivot like a seesaw, and transfer weight from one side to the other.
Posture of the right hand when the bow is at the middle. Pay attention to the index finger contact point:
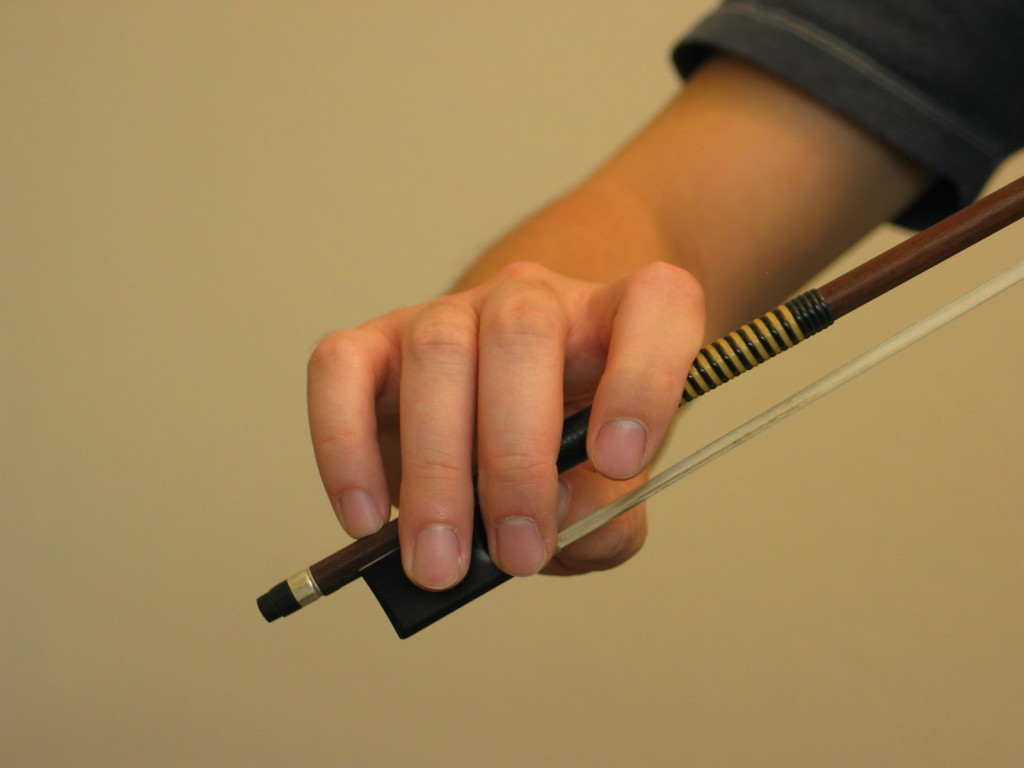
The following image is flipped and is what you’ll see in the mirror:
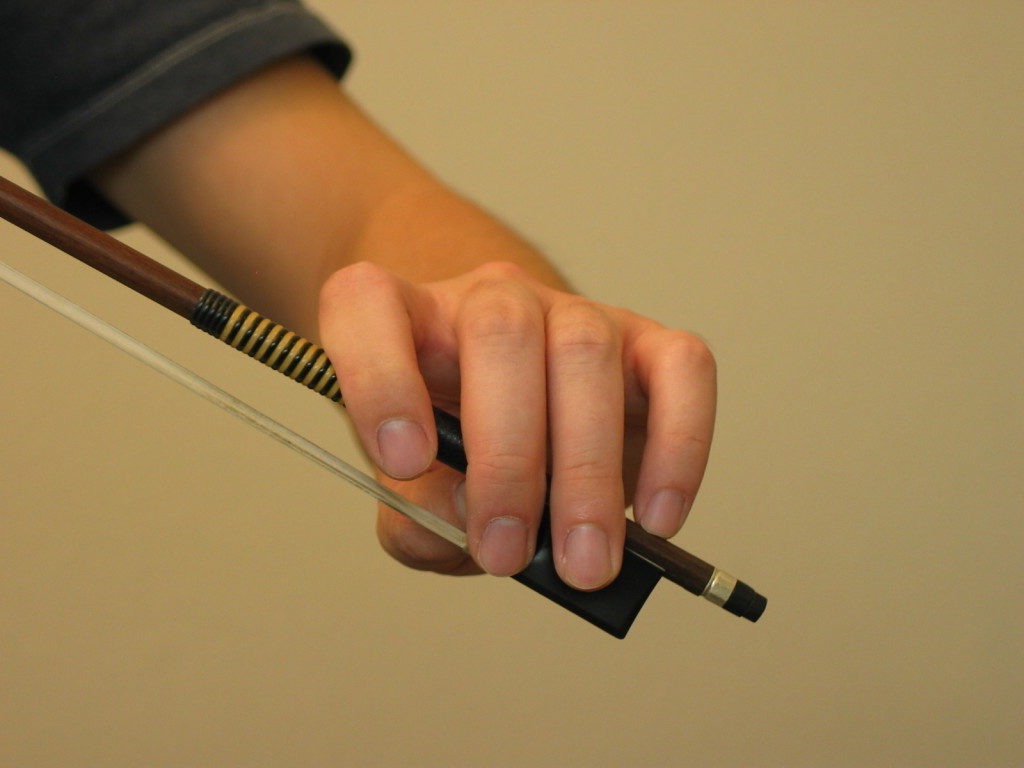
Note the wrist should be relatively flat when the bow is at the middle. This is important and will effect the control, clarity, and evenness of sautille and fast detache. From the player’s view:
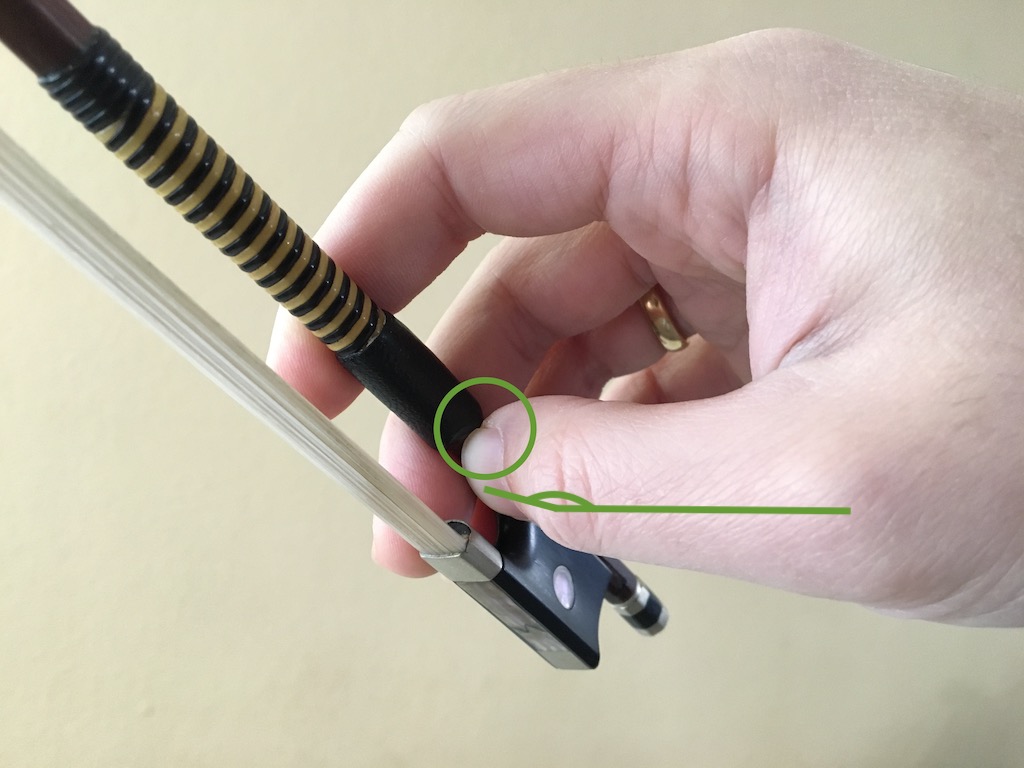
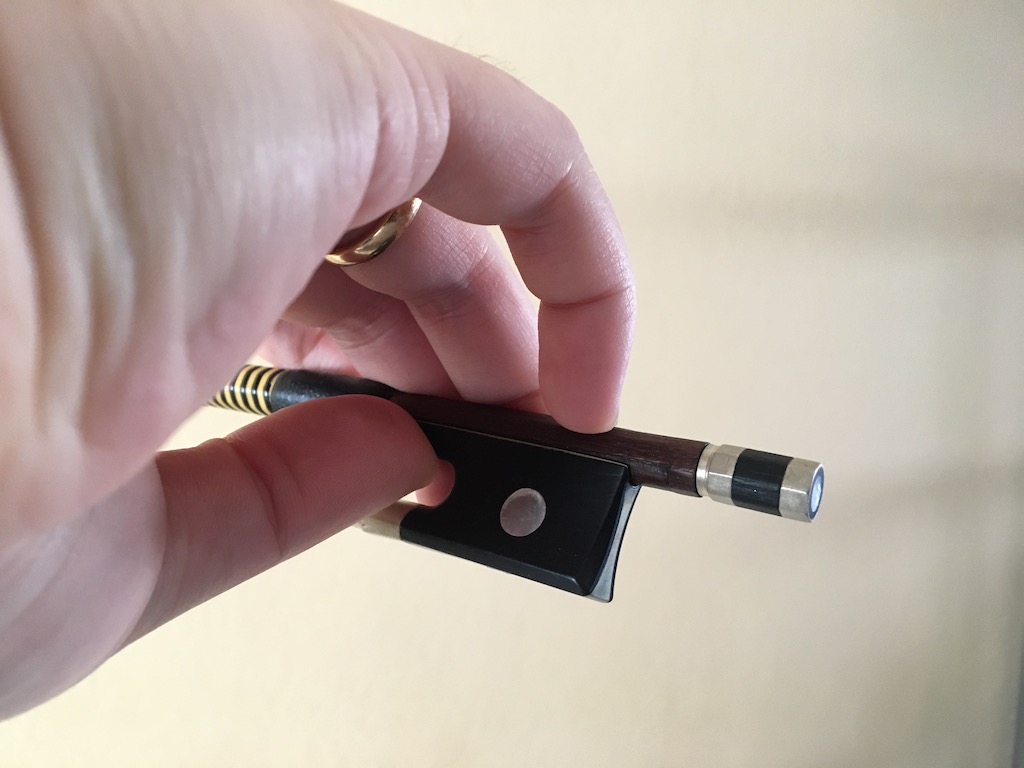
A closer look at the relationship between the thumb and the middle finger. The thumb should be slightly curled outward to allow flexibility. The degree of curvature varies depending on your finger length and joint length. Pay attention to the contact point of the thumb:
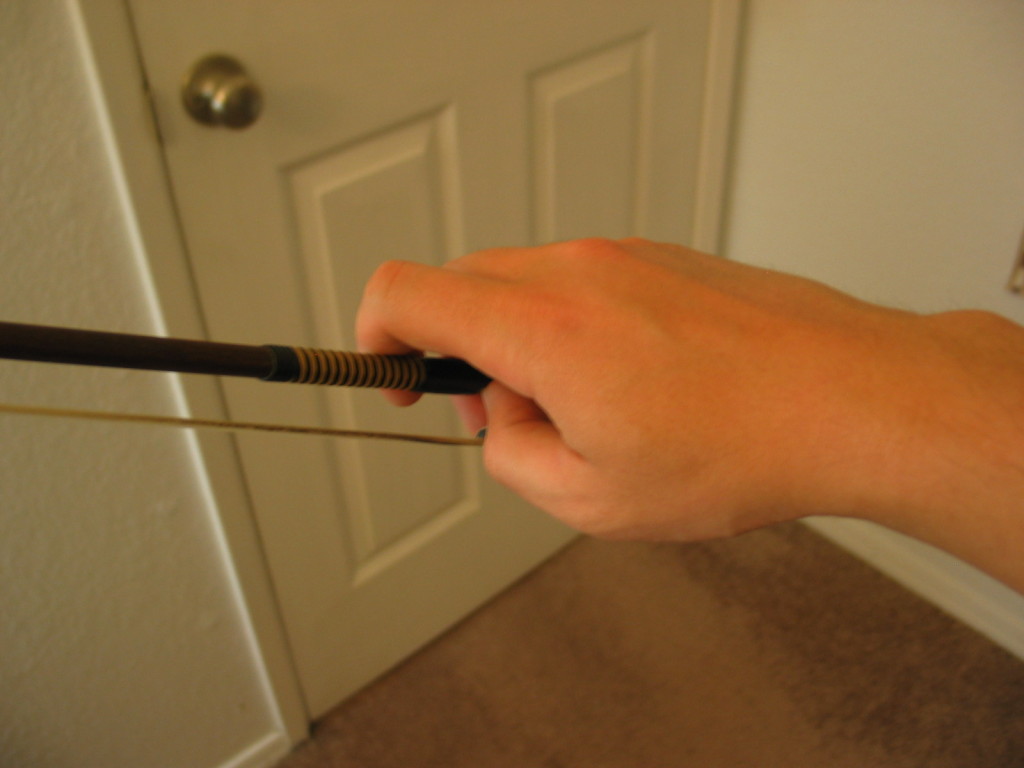
Another angle to see the contact points of the pinkie and ring finger:
The following video demonstrates the pinkie’s role in the seesaw motion. This is also a strengthening exercise for the pinkie. Note that no wrist or arm movement should be involved in this exercise:
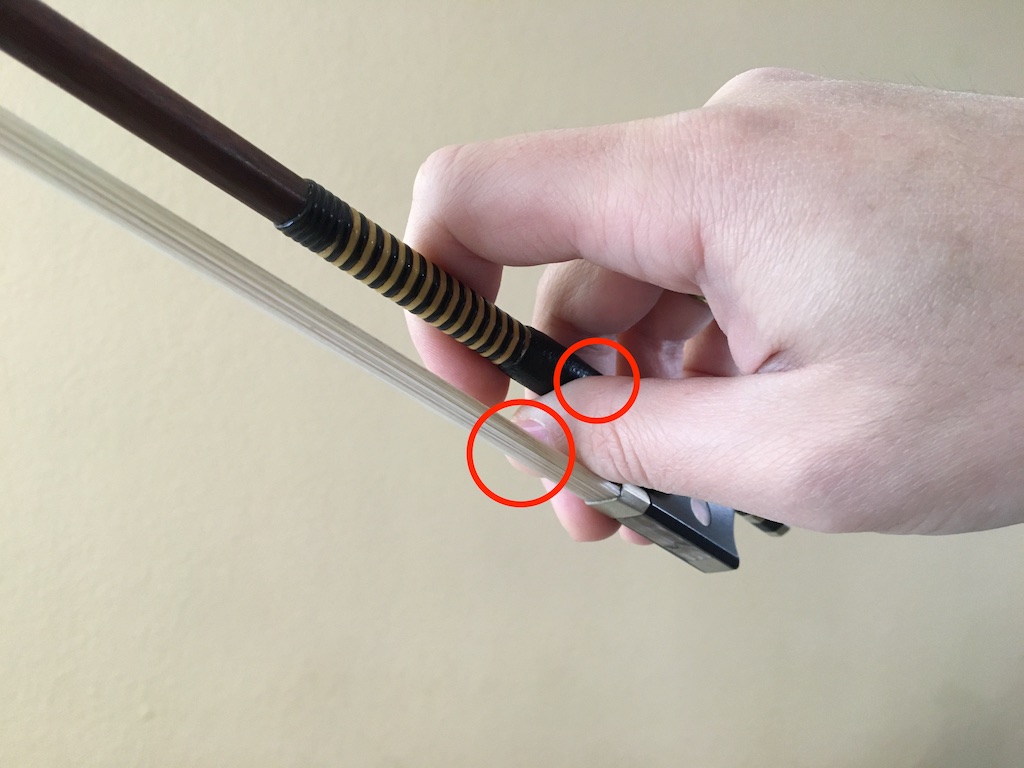
The following group of images show common mistake (highlighted in red):
Mistake 1: The contact point of the thumb is incorrect. The relationship to the middle finger is incorrect.
Mistake 2: Thumb is too straight or curling inward, causing the other fingers to be vertical in relation to the bow, and excessively elevated wrist.

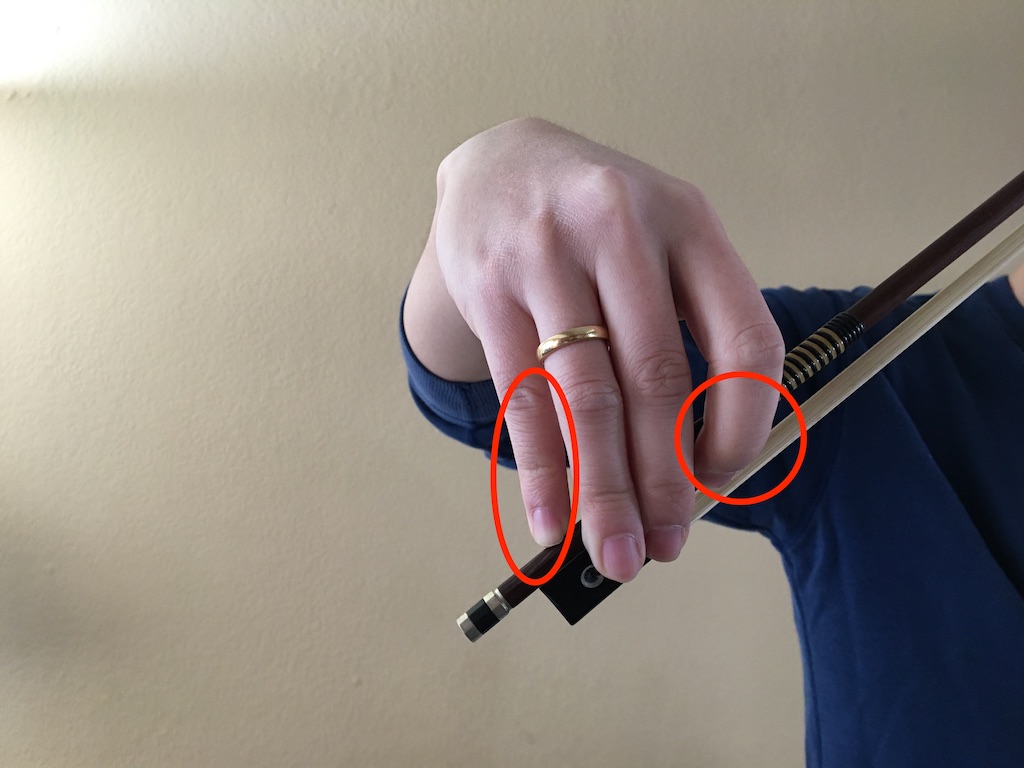
Mistake 3: Middle finger and ring finger have incorrect contact point. The correct contact points should be the creases of the fingers so that they wrap around the bow stick relaxingly. Having the finger tips as contact point creates instability in the bow.

Mistake 4: This is likely caused by mistake 2, and is common when playing at the frog. Pinkie is too straight and the index finger should not picks up the bow. Instead, the index finger’s role is to transfer the weight of the arm onto the bow stick in the middle to upper half. It keeps the bow down and maintain traction between the bow hair and the strings.
Mistake 5: The index finger is tensed and the joint is higher than its knuckle. The pinkie is straight and pushing the bow away from the hand. This posture locks the entire right hand and prevent the fingers from pivoting. It is likely caused by right hand’s excessive rotation angle against the bow stick (second image). The third image shows the normal angle.

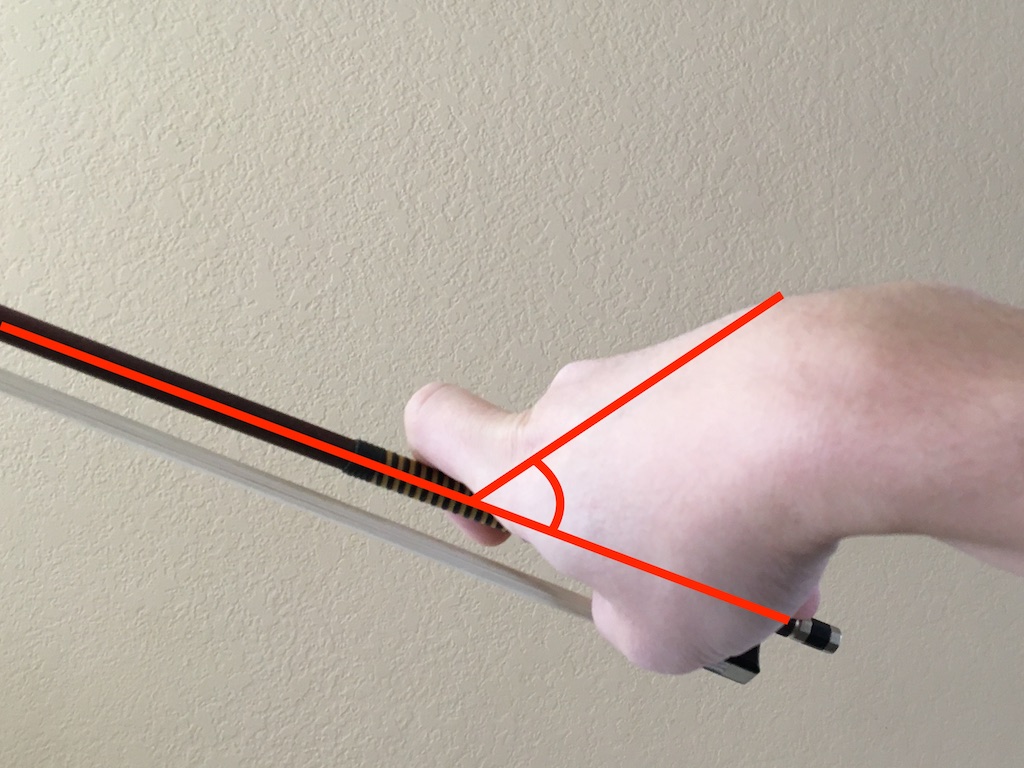
Normal angle:

Tips:
- All fingers need to be relaxed to a point where the bow almost falls out of the hand. To test, hold the bow stick upright with the frog facing the ground vertically, then loosen fingers until the bow slides down easily without dropping onto the ground. Make sure the posture is correct when doing this test.
- Placing the bow on the strings or hold one side of the bow with the left hand while correcting your posture will be easier because it reduces bow weight.
Finger Motion: Flex Fingers to Ensure Smooth Bow Change and Continuous Sound
It’s very important that the fingers pivot and flex along with the wrist to create a “wave” in the arm when the bow moves up and down. This ensures smooth bow change and is required to play more advanced bow stroke such as Colle. Visit the Finger Motion and Exercises page for detailed explanations.
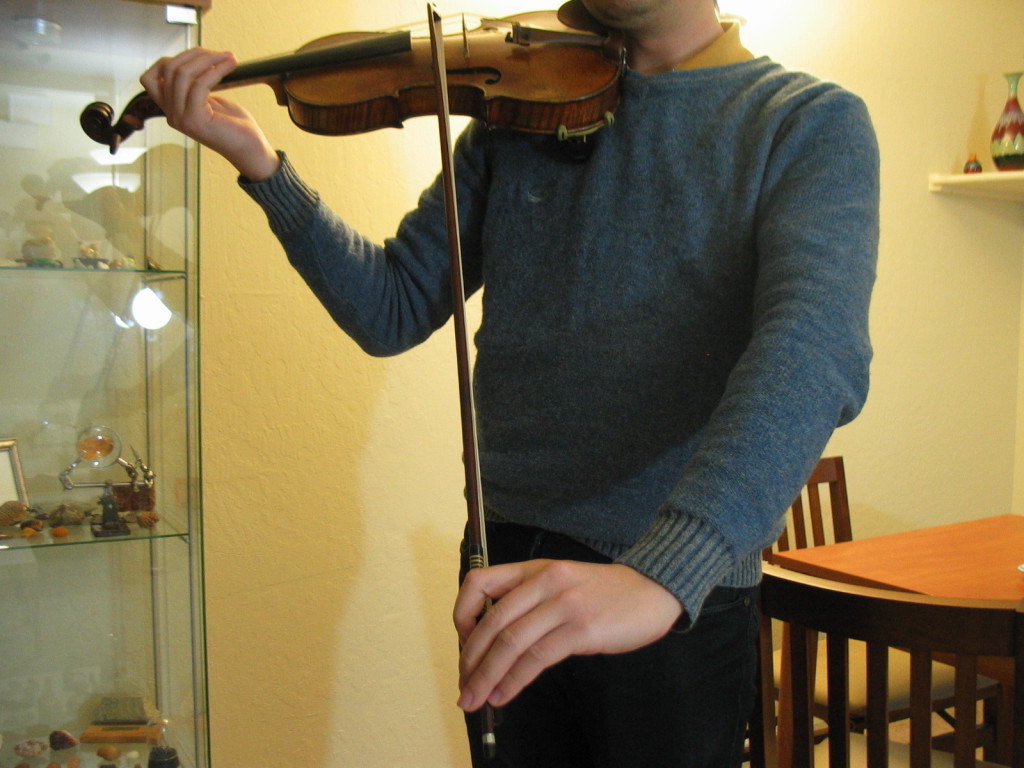
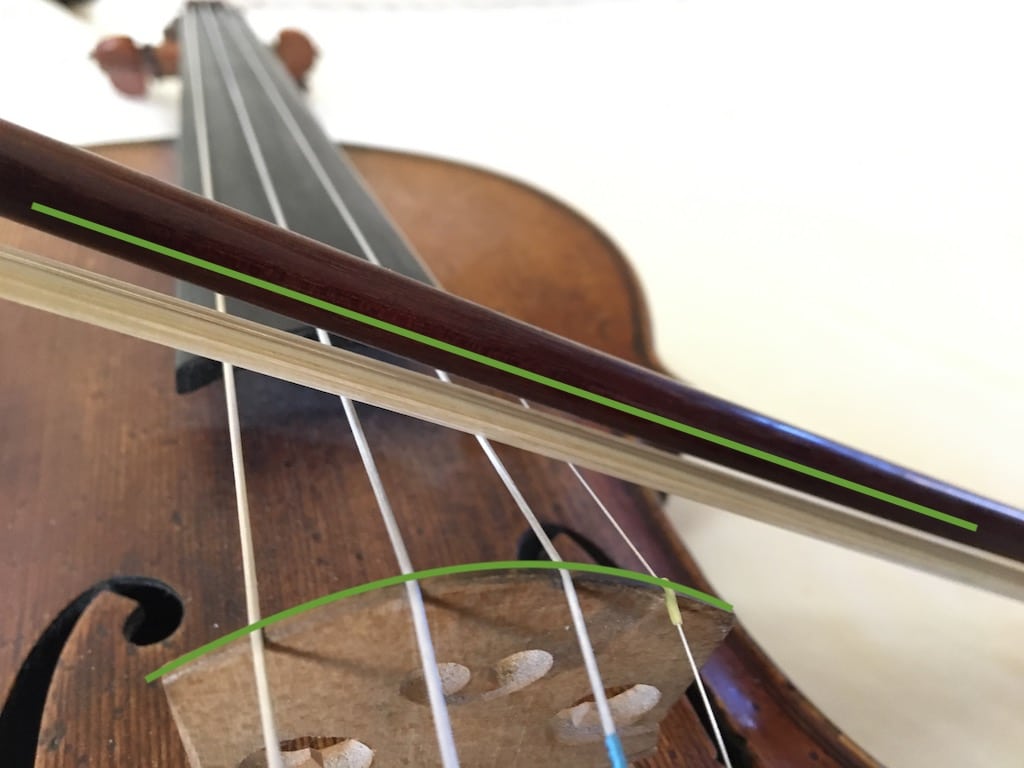
The Right Arm: Keep Bow Parallel to Bridge
The bow must be parallel to the bridge at all time. This is one of the factors that effect the sound quality. Other factors such Sounding Point of the bow and Speed and Weight will be discussed in sound quality improvement.
Incorrect bow angles:

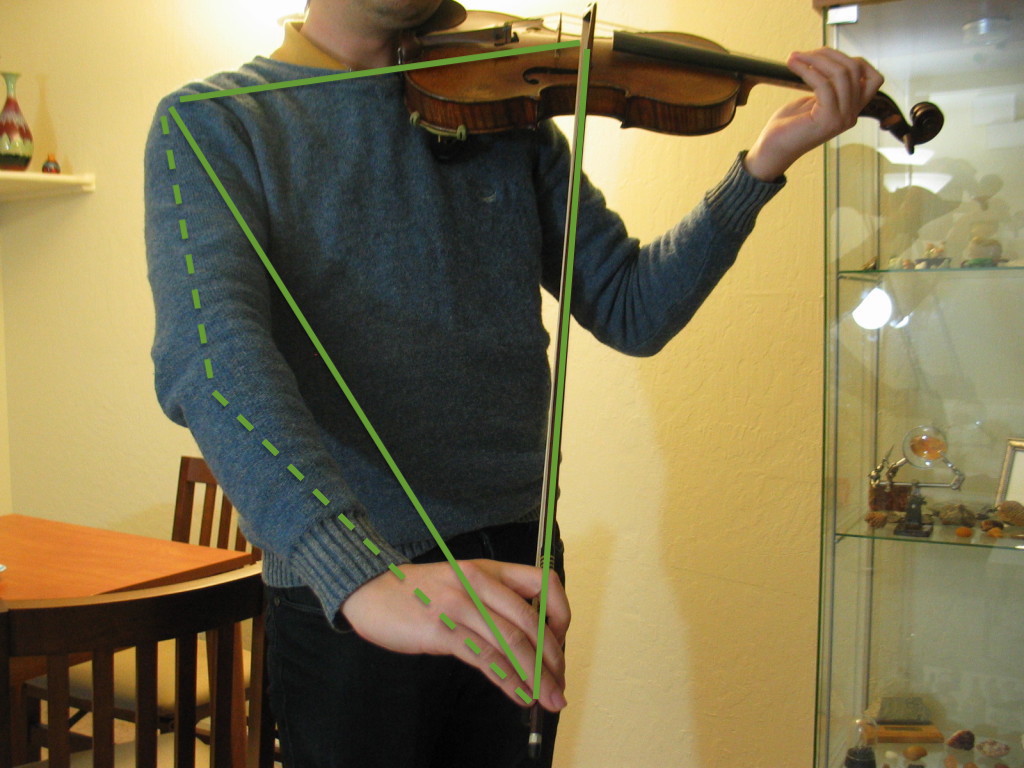
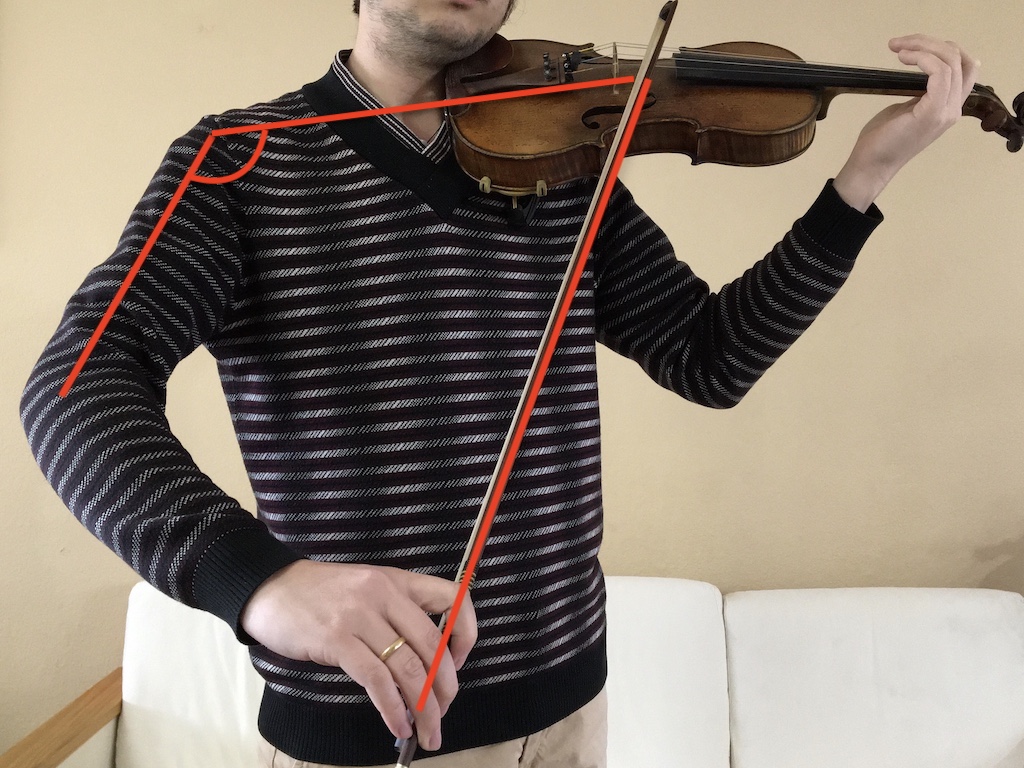
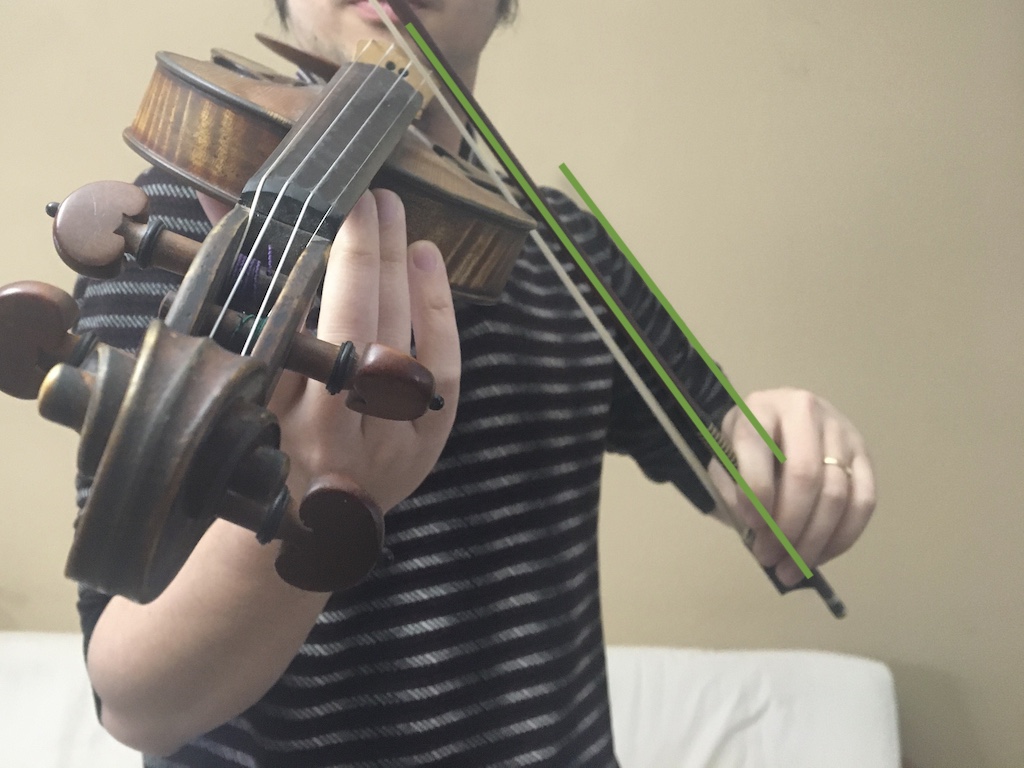
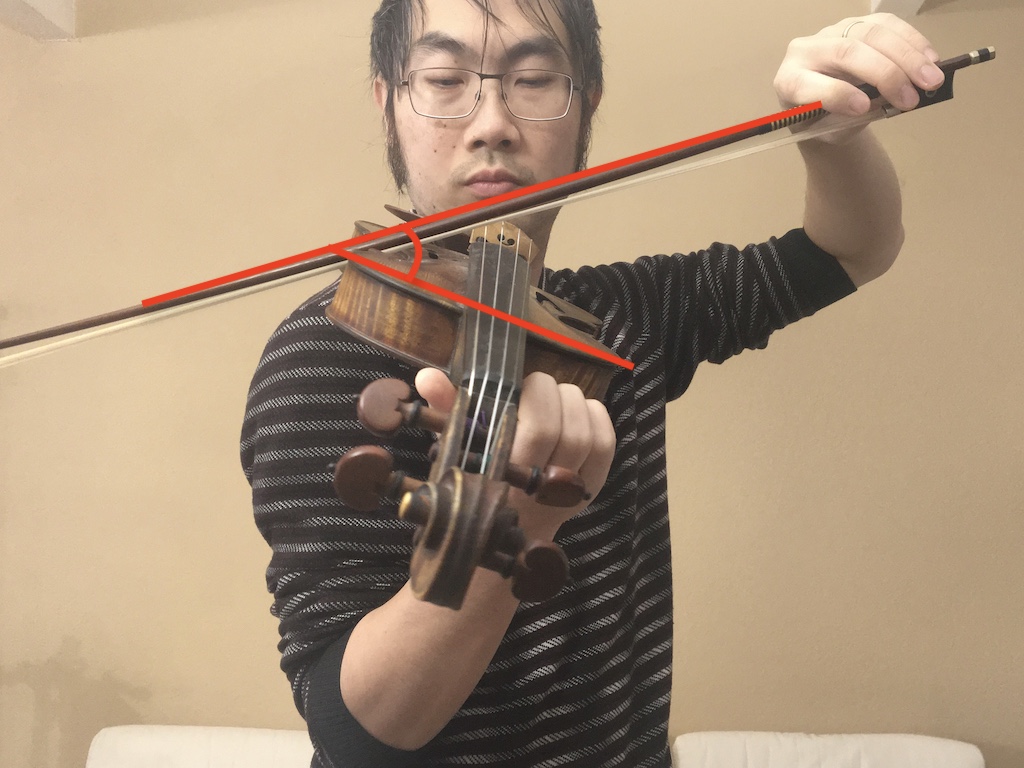
To maintain the correct bow angle, the right arm geometry must change when playing at different part of the bow. When the bow is placed at the tip, the arm and the bow shape approximately a triangle/trapezoid (depending on your arm length).
Mirror view:
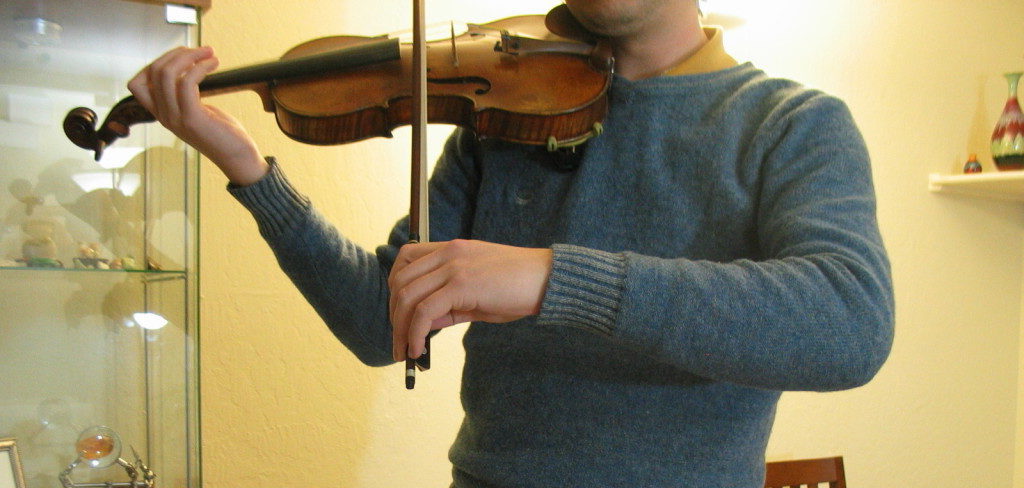
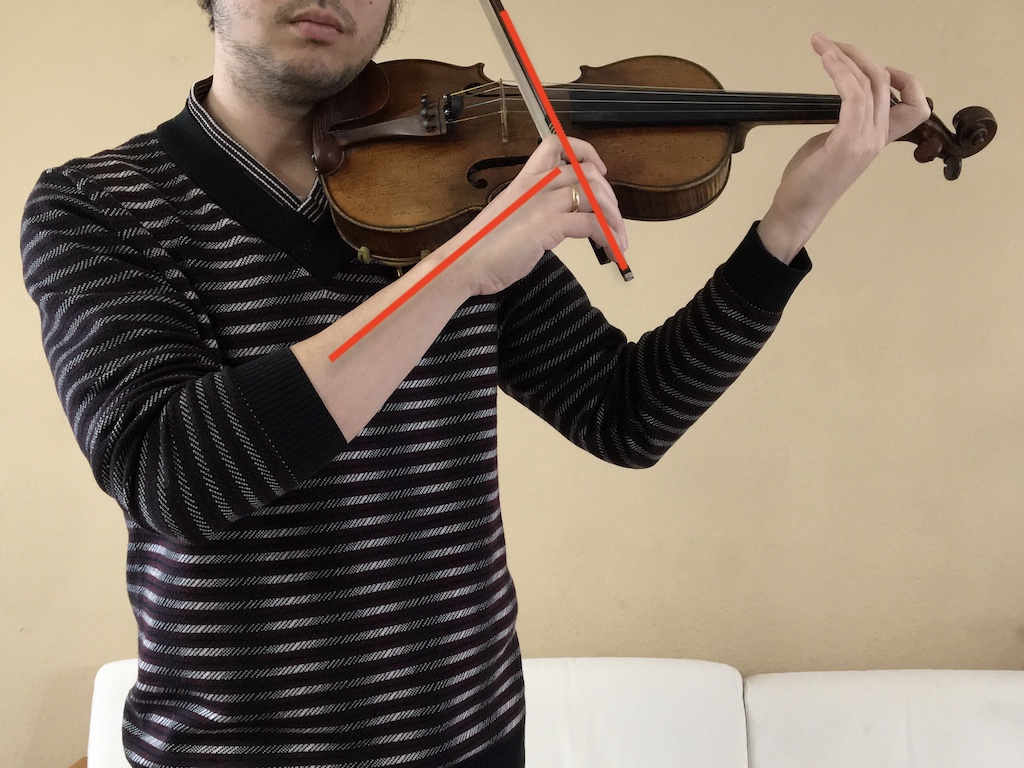
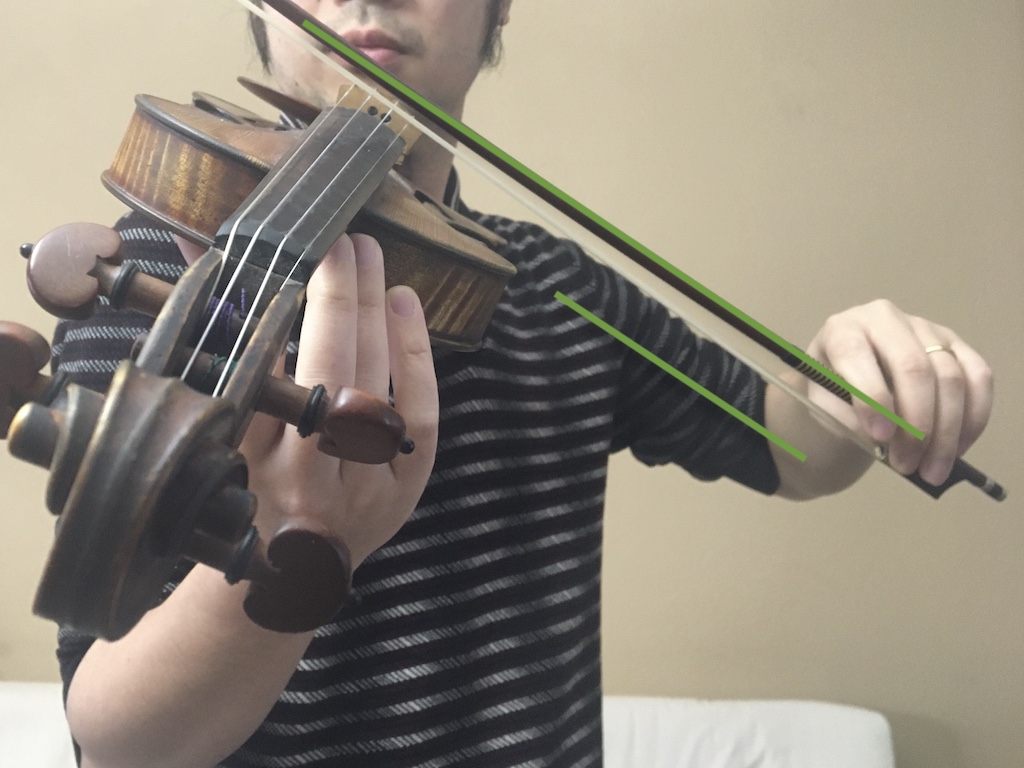
When the bow is placed at the middle, the shape becomes a rectangle/diamond (depending on your arm length).
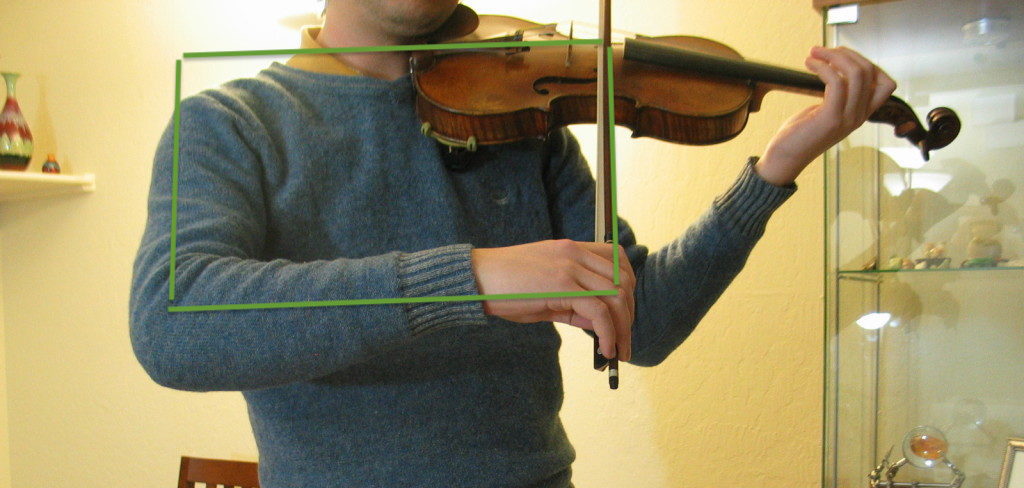
Mirror view:
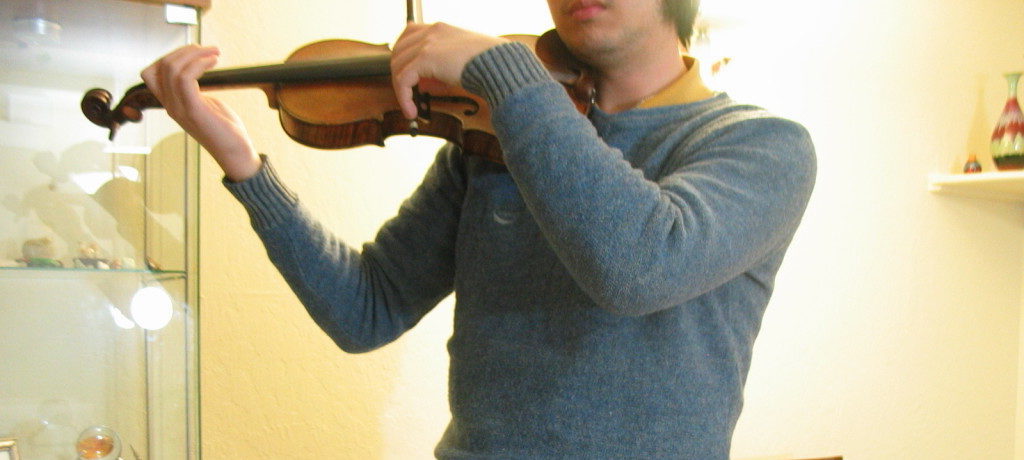
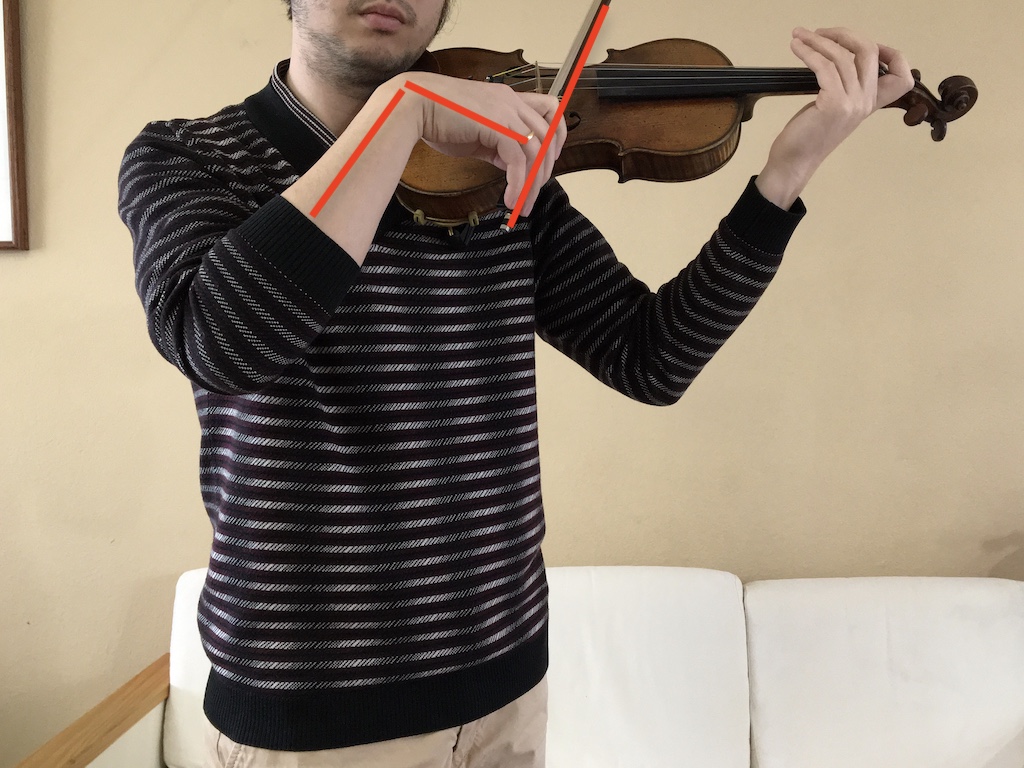
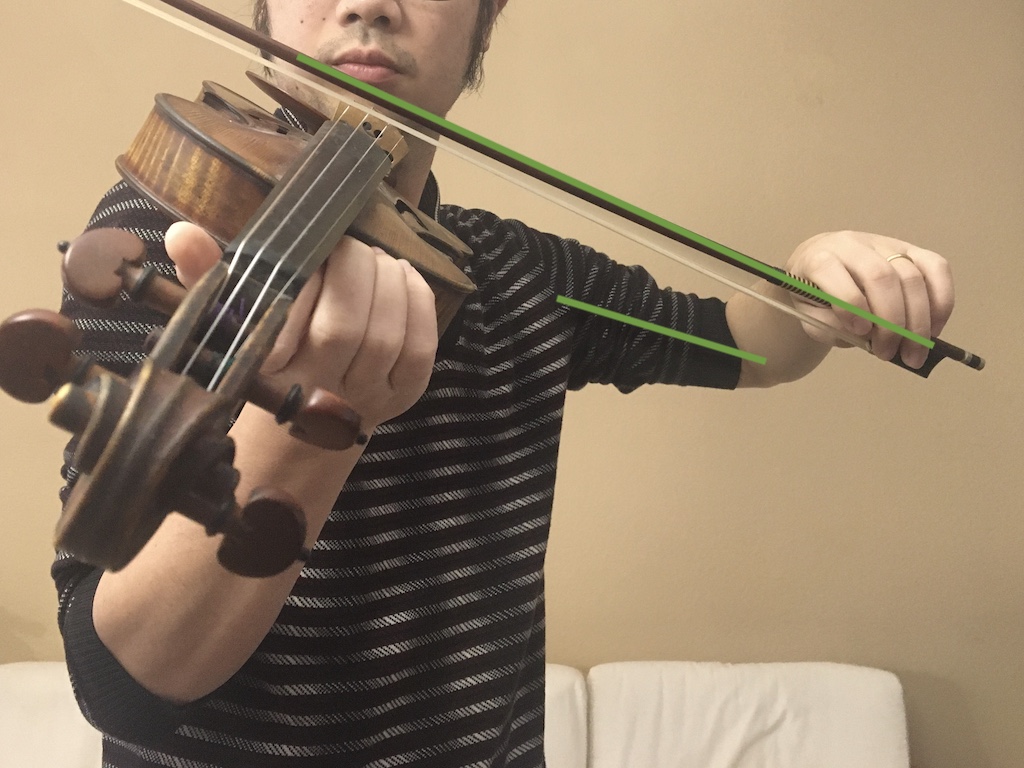
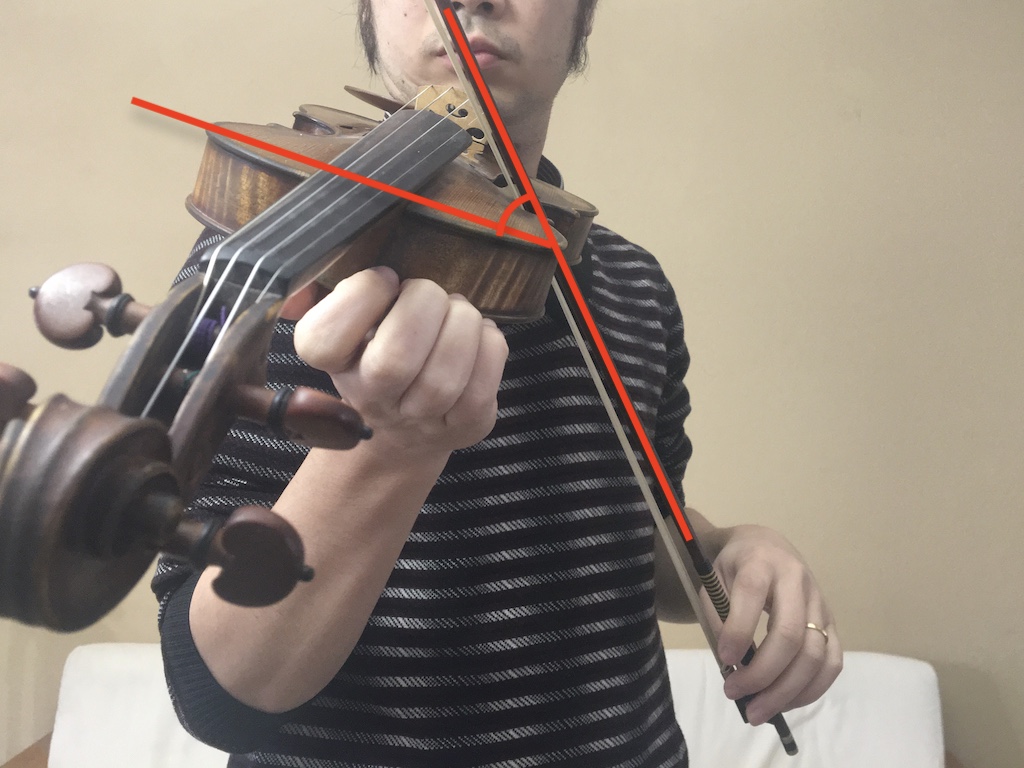
When the bow is placed at the frog, the shape becomes another form of triangle. Notice the changing positions of the elbow and how it constantly moves back and forth as the bow travel down and up.
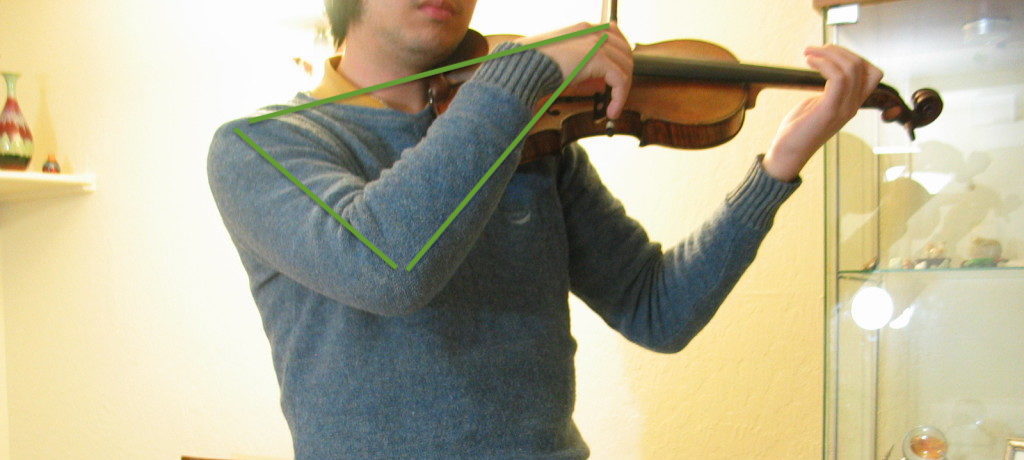
Mirror View:
Keep the entire right arm relaxed. Maintain elbow height on different strings so that the bow, hand, forearm and upper arm stay on the same plain.
The following video shows how the right arm and hand move when playing full bow. Pay attention to the changing position of the elbow and bending of the wrist. The bow is parallel to the bridge only if each segment of the right arm moves correctly.
The following group of images show common mistakes, mostly when playing at the tip or frog:
Mistake 1. It happens often when playing at the tip. The upper arm pulls the elbow back. Instead it needs to push the elbow forward (straightening the arm). In addition, this could be fixed by bringing the instrument toward the player’s right to reduce the distance between left and right arms.
Comparing it to the correct angle:

Listen to the unpleasant sound in the following two wrong posture videos. The first video shows the lack of upper arm forward motion and causing the elbow to be stationary. Second video shows the lack of forearm motion while the upper arm mistakenly pulls to the back.
Mistake 2. This often happens at the frog. In this case the wrist is bending enough. To assist the correction, bring the instrument toward the player’s left to increase the distance between left and right arms.
Correct angle with the wrist bent:

Be sure not to excessively bend the wrist or else the bow will not be parallel to the bridge:
Watch the following two wrong posture videos. The first video shows the lack of wrist motion. The second video shows excessive wrist bending while the elbow is following enough and the bow doesn’t reach the frog.
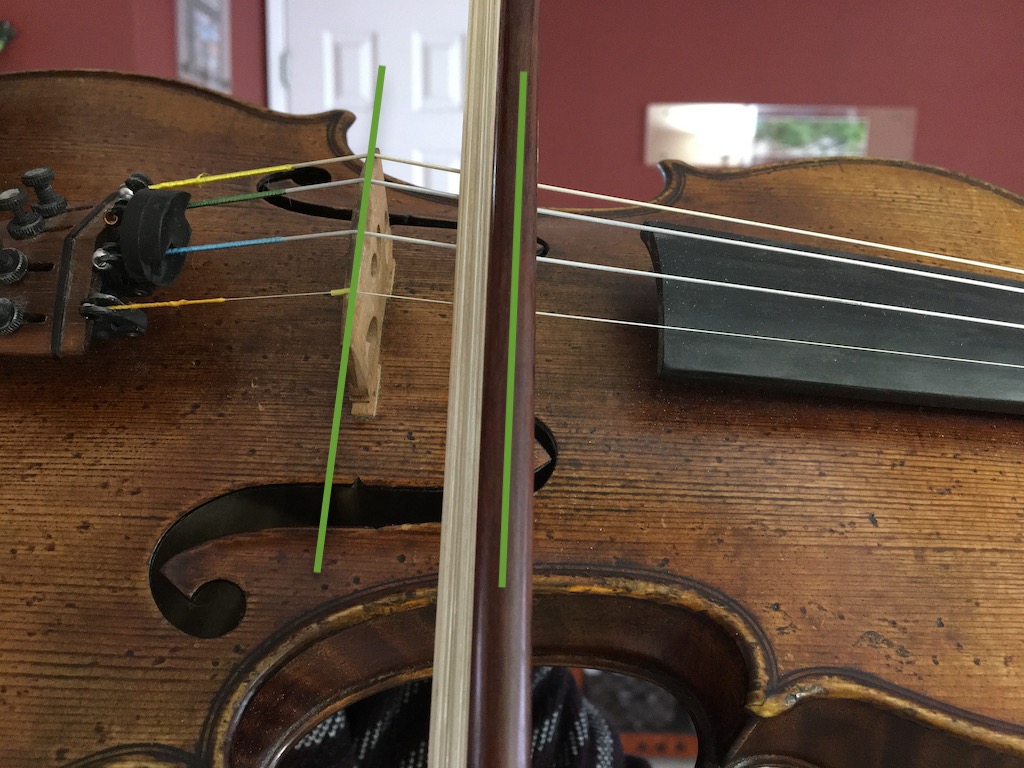
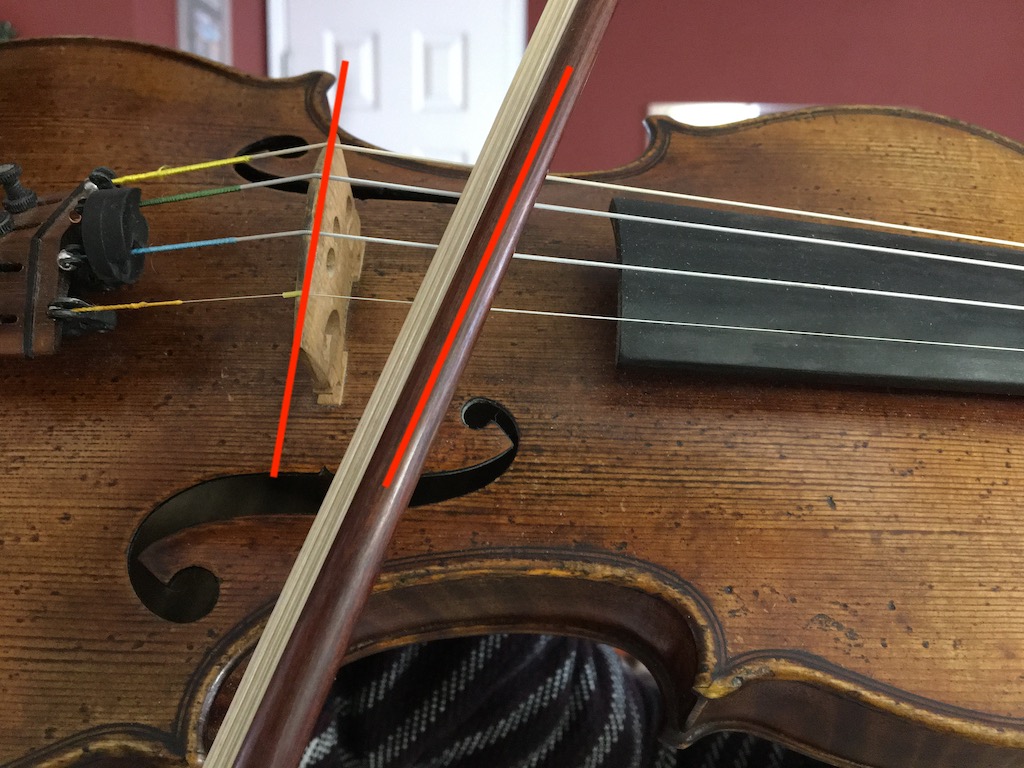
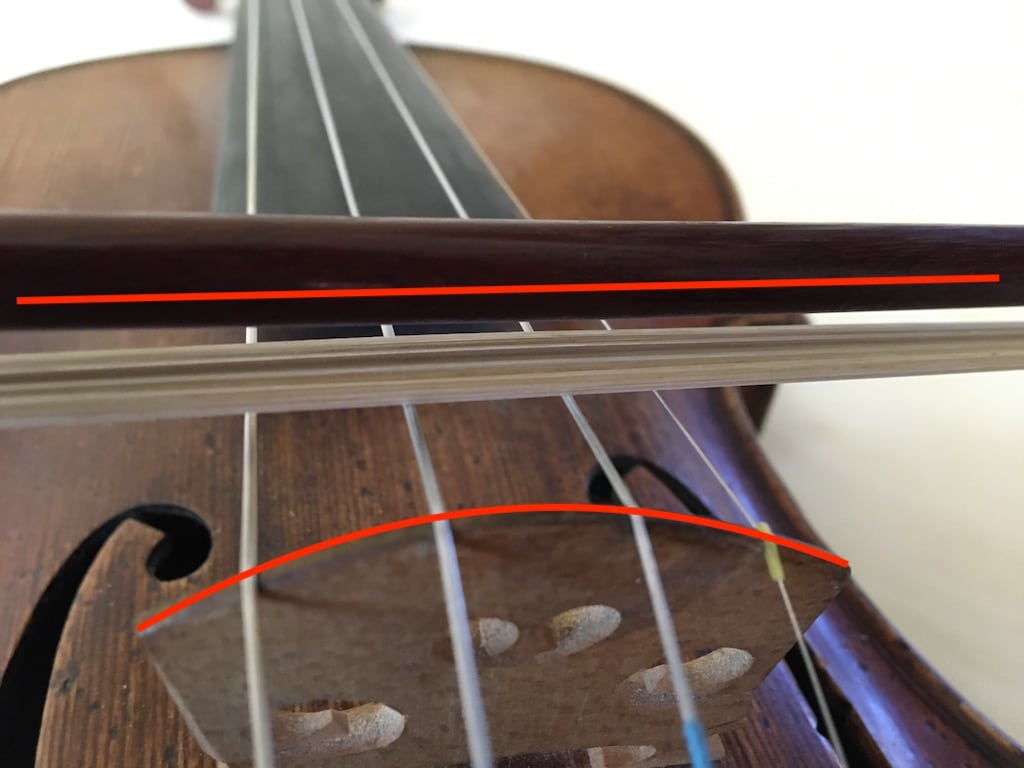
Another common problem we face is the optical illusion of the bow in relation to the bridge when viewing from the player’s angle. Compare the two views below:
When the bow is truly parallel to the bridge, it should NOT appear to be parallel from the player’s view.
If the bow appears to be parallel to the bridge viewing from the player, it’s actually incorrect and the bow is crooked. This is why we need to practice in front of the mirror to check and correct this problem.
Tips:
- To summarize, when approaching the tip of the bow, push elbow forward as the wrist is lowered. When it changes direction and begin the up bow stroke, bring the elbow backward and the wrist gradually rises. When approaching the frog, wrist bends a bit more and make sure the elbow follows the bow so that bow reaches the frog.
- Keep the elbow relaxed and in the same plain as the bow (see the next section about elbow height). Incorrect elbow height could also result in crooked bow.
- Practice all four open strings slowly with full bow for 15 minutes every day to correct this problem.
Elbow Height: Keep Elbow and Bow On the Same Plane
The elbow height must be adjusted when playing on different strings, so that it stays on the same plane as the bow. Elbow being too high or too low could contribute to crooked bow and increased right arm tension. With the scroll of the violin facing the mirror, check to see if the bow stick is relatively parallel to the upper arm on all four strings:
E-string
A-string
D-string
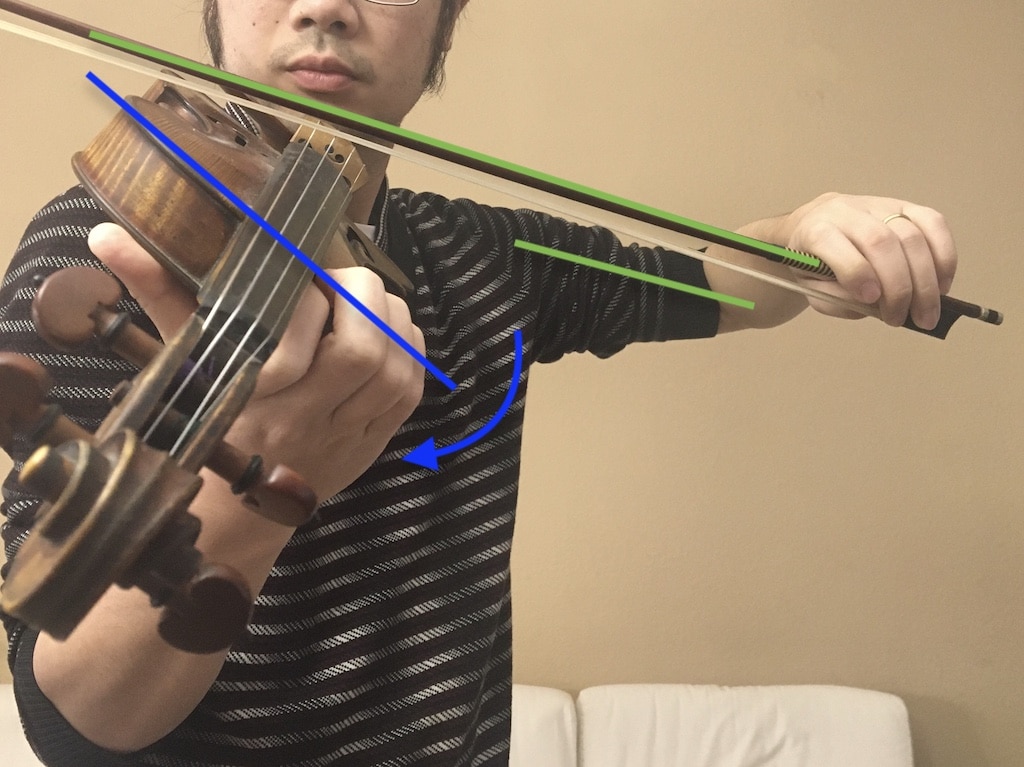
G-string. Rotating the violin slightly (indicated by blue arrow) can avoid excessive right arm lifting, therefore enhancing the balance of the bow and make it feel less heavy.
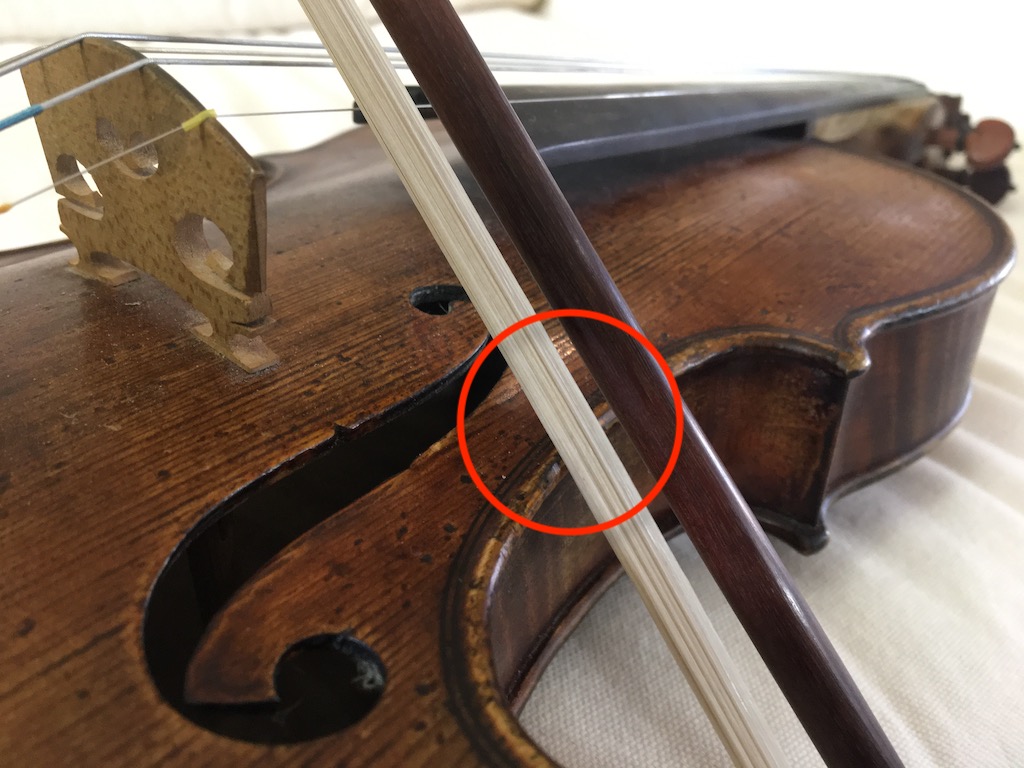
The following pictures show common problems. In the first picture the elbow is too low when playing on the E-string. The bow angle is too steep in relation to the top soundboard of the violin. This usually results in the bow hitting the C-bout (second picture). If the E-string side C-bout has a lot of rosin dust then it could be an indication of this problem.
Excessive arm lifting and steep bow angle on the G-string. At this angle the bow control will be very difficult:
Arm Weight, Not Arm Pressure
The natural weight of the arm keeps the bow down. The arm needs to rest on the bow stick naturally with no excessive force to press the bow down or lift the bow up.
The following exercise helps the player feel the weight of the arm. Use the left hand to hold the bow in the lower half (with the frog facing player’s right), then rest the right hand on the bow stick at the frog and relax the entire right arm. Repeat this at different height.